

How To Create A New Folder In Google Mail
How to create folders in Gmail
One of the most commonly Googled questions about email is how to create folders in Gmail. The truth is that that's technically impossible. There's no "folder" creation option because Gmail doesn't have folders. But what it does have is basically the same thing: labels.
Labels essentially work the same way as folders in other email providers, so this is how to use them to make your messages more manageable.
- How to make Gmail your default mail app in iOS 14
- The best laptops under $500
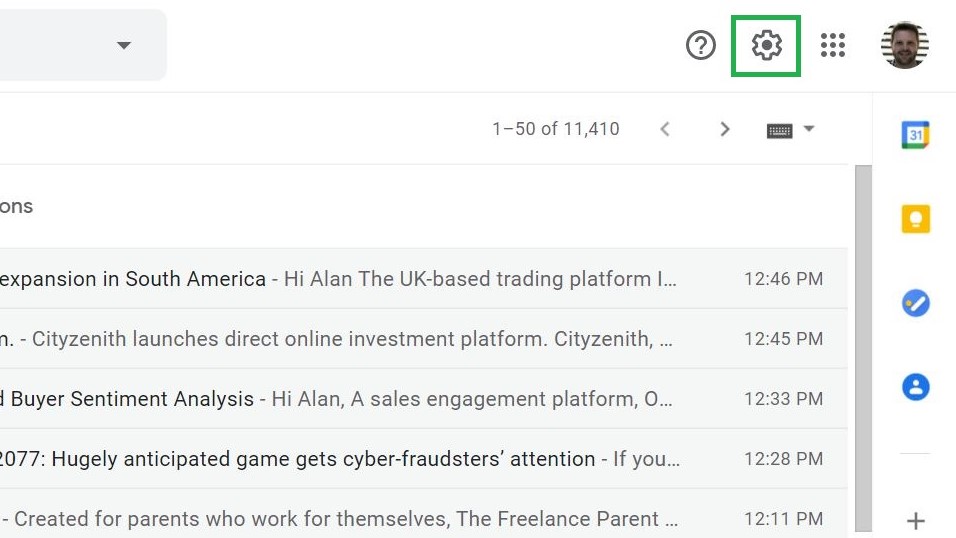
1. Head to Gmail's settings
As ever, your journey starts at Gmail.com, so log in on a desktop or laptop computer. From there, you want the settings, so press the cog in the top right-hand corner.
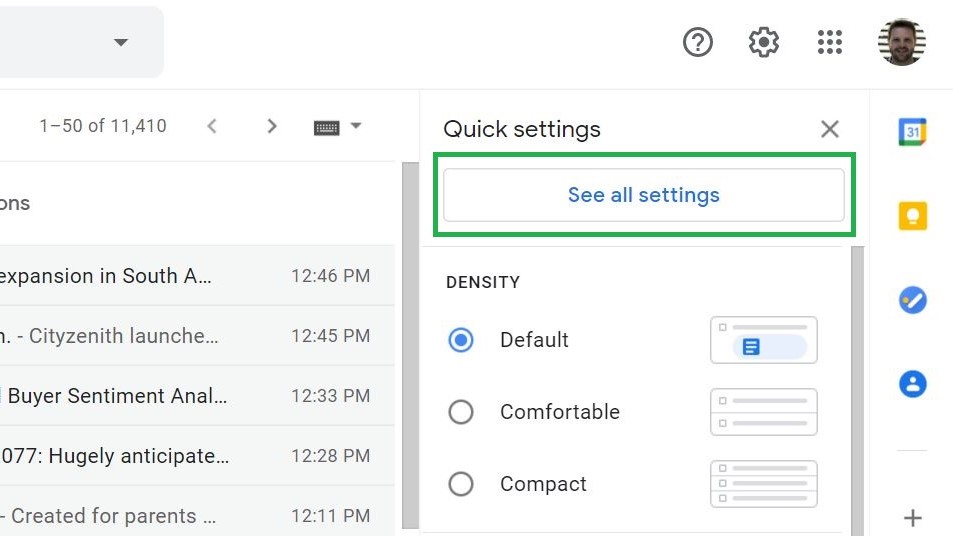
2. See all settings
An expanded menu will pop up. Press the large button labelled "See all settings."
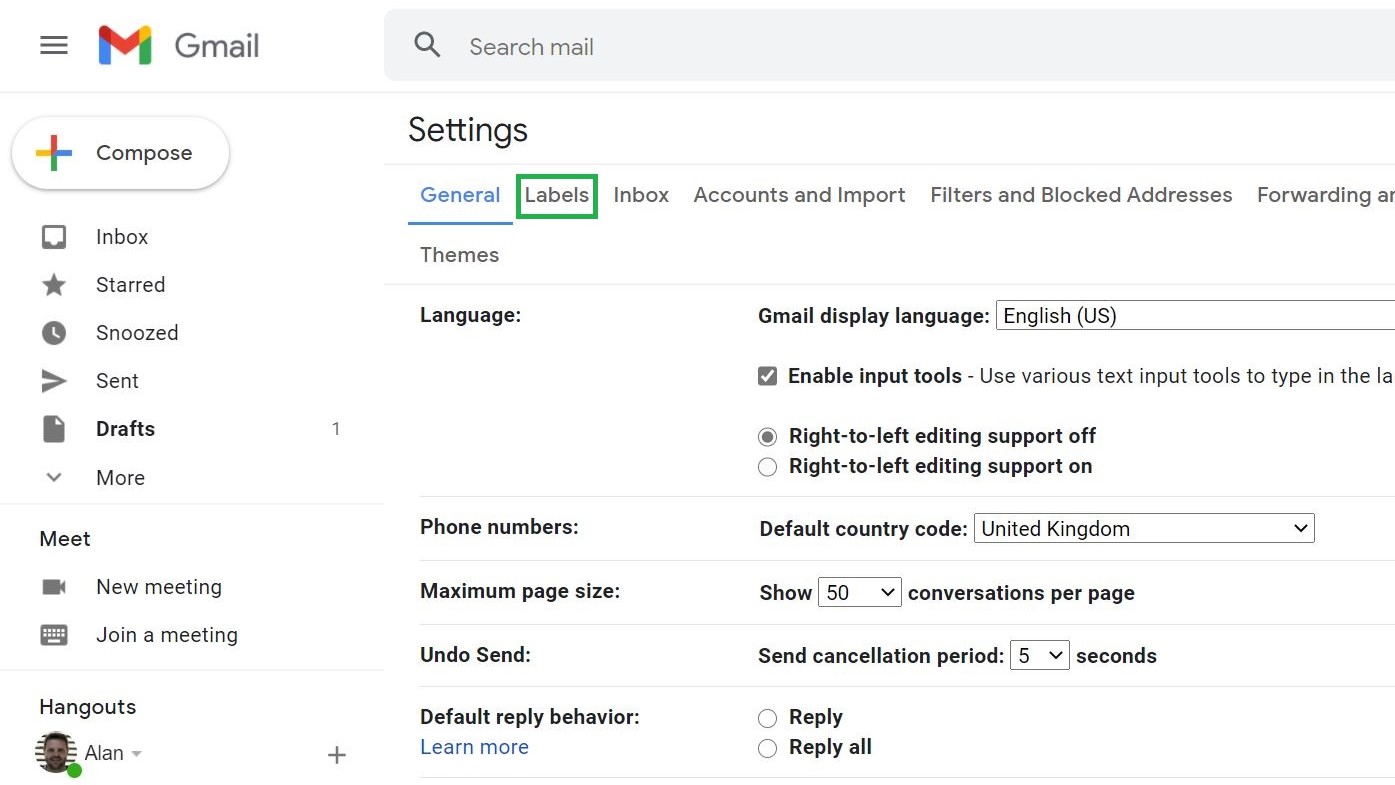
3. Switch to the "Labels" tab
Remember that Gmail insists on calling folders "labels". With that in mind, click the second table on the top, below the "Settings" title: it's called "Labels."
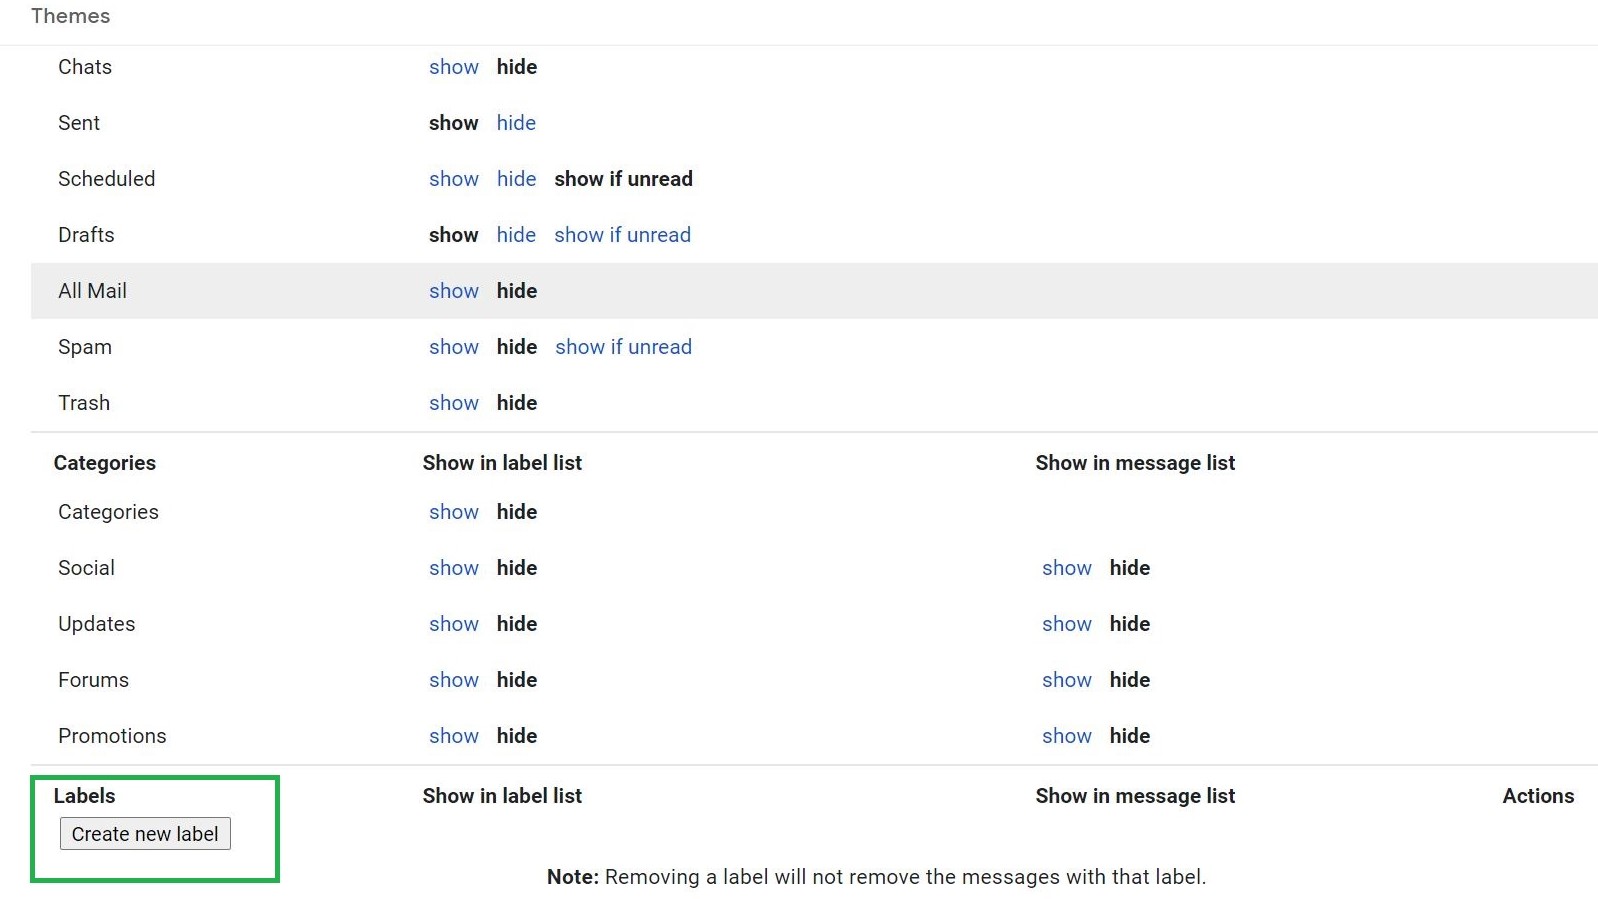
4. Find the option to create a new label
Scroll to the very bottom of the page, and you'll find a button labelled "Create new label". Click it.
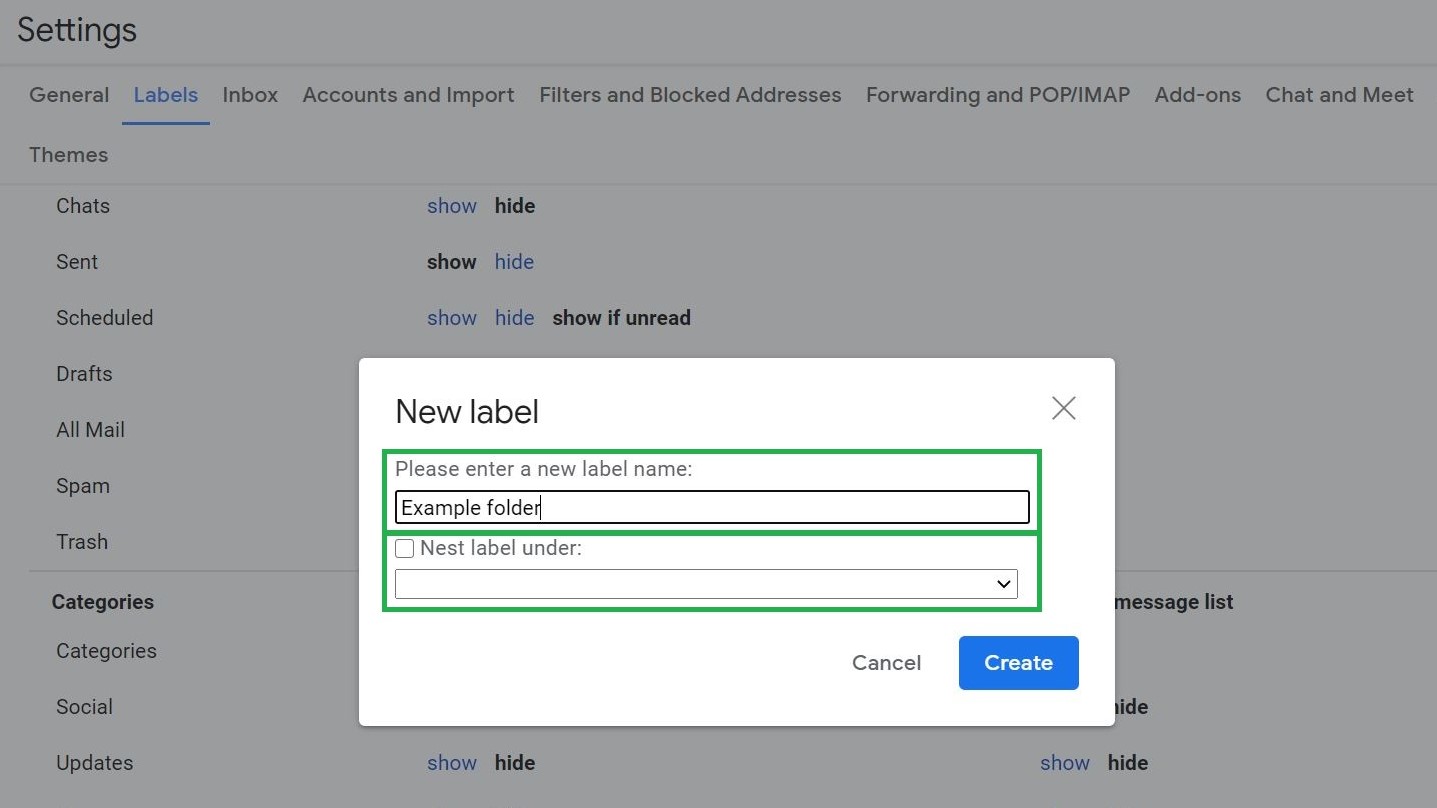
5. Give your label a title
A pop up will appear giving you the opportunity to give your label a title. Type in something memorable.
Note that you also have the option to "nest labels" here — basically create subfolders within folders. If you want to do this, use the drop-down menu to pick where you want your new label to live.
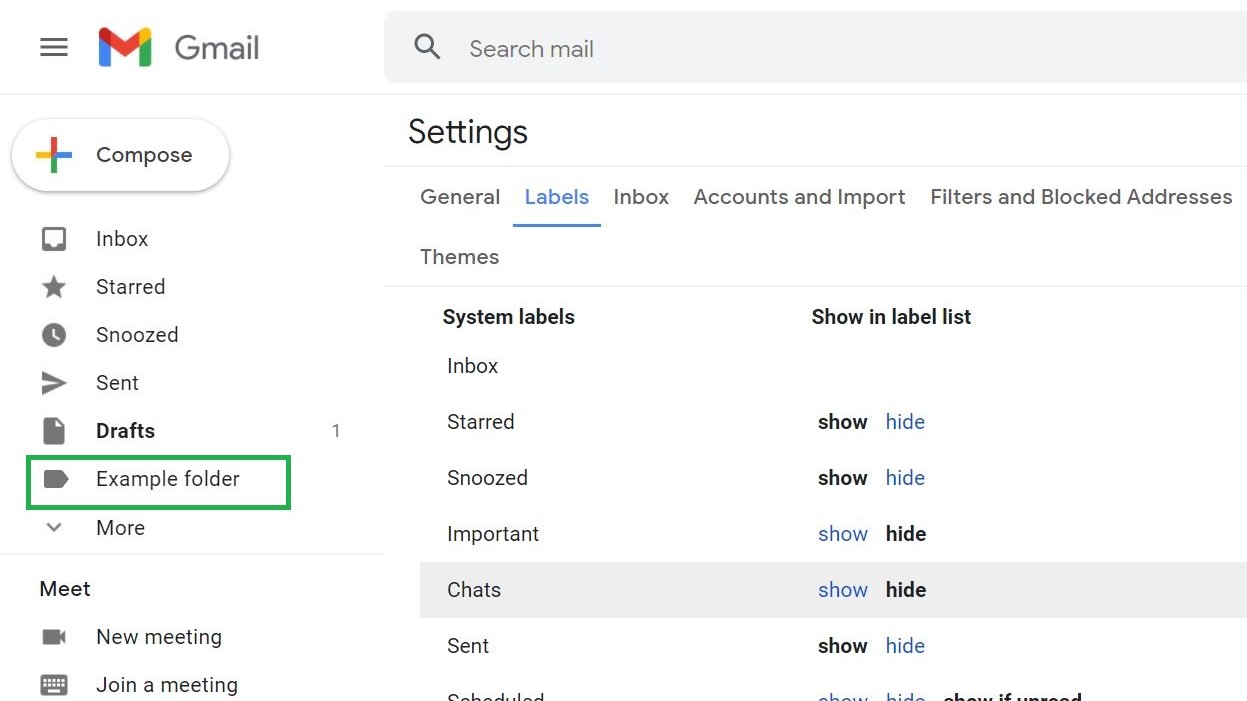
6. Your folder is now live!
You may need to refresh the page, but your new folder should appear in the left-hand panel of your inbox, ready to be used.
7. Fill your folder
There are a few ways to do this, but the easiest way to start out is to simply drag and drop. Move the emails you want in that folder by dragging them from your inbox to the newly created section.
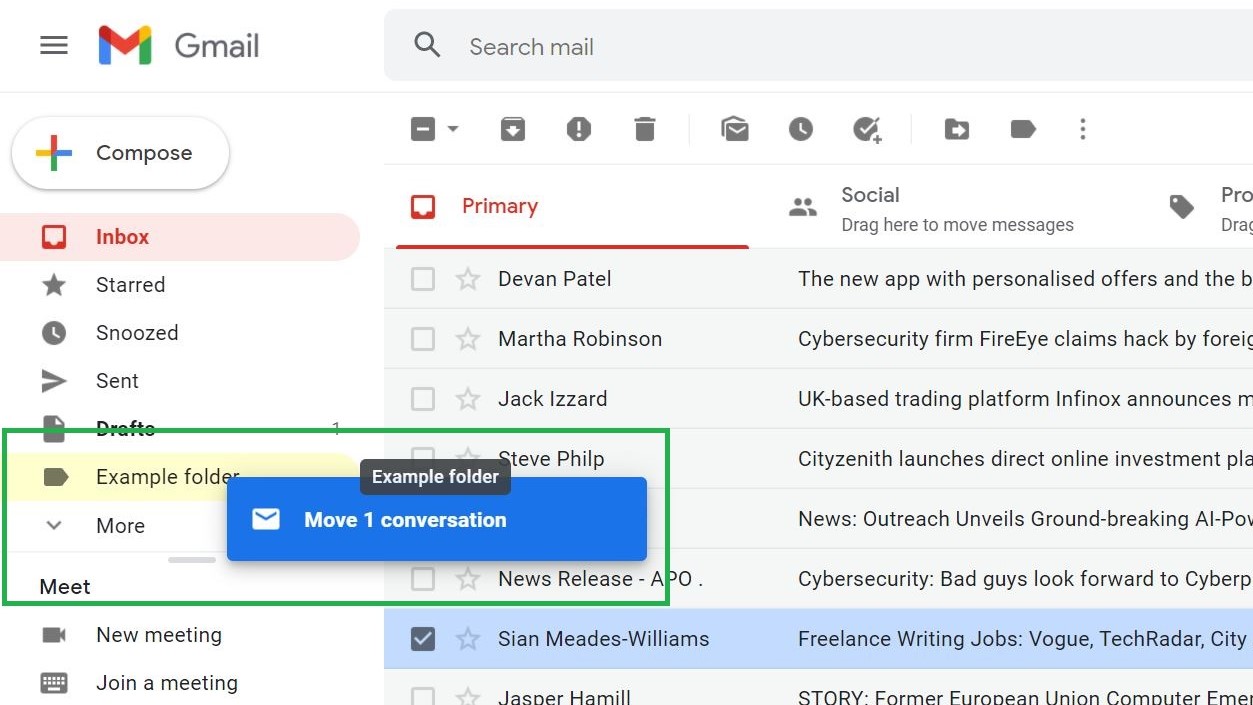
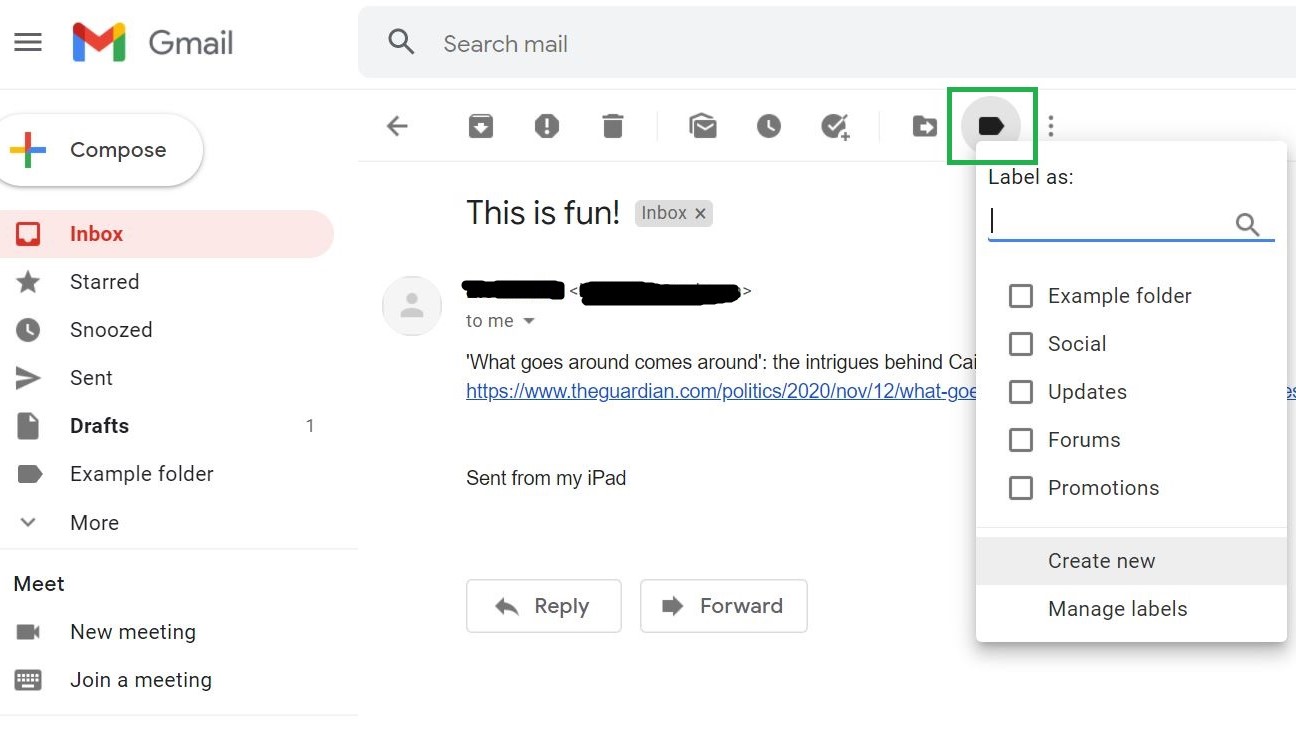
Alternatively, you can label emails as they come in by pressing the label icon (the last one in the row next to the three vertical dots) and then ticking how it should be labelled like so:
More Gmail tips
- How to use Gmail — essential tips and tricks
- How to create a new Gmail account
- How to delete your Gmail account
- How to log out of Gmail
- How to change your name in Gmail
- How to block emails in Gmail
- How to recall email in Gmail
- How to mark all as read in Gmail
- How to delete all emails in Gmail
- How to create folders in Gmail
- How to empty trash in Gmail
- How to change your password in Gmail
- How to archive email in Gmail
- How to activate Gmail dark mode
- How to turn on Gmail's two-factor authentication on your desktop
- How to set up Gmail two-factor authentication (2FA) on your phone

Freelance contributor Alan has been writing about tech for over a decade, covering phones, drones and everything in between. Previously Deputy Editor of tech site Alphr, his words are found all over the web and in the occasional magazine too. When not weighing up the pros and cons of the latest smartwatch, you'll probably find him tackling his ever-growing games backlog. Or, more likely, playing Spelunky for the millionth time.
How To Create A New Folder In Google Mail
Source: https://www.tomsguide.com/how-to/how-to-create-folder-gmail
Posted by: dellingerknobson.blogspot.com
0 Response to "How To Create A New Folder In Google Mail"
Post a Comment